The wind is already whistling through the shrouds, and the crew is eager to untie the mooring lines. At such moments, it's easy to give in to the rush and miss an open bow hatch, an untidy anchor rope, or a discarded jacket. But it's those few minutes on the mooring lines that determine whether a sudden engine failure, a broken rudder, or a leak becomes a routine matter or a real emergency.
Pre-trip sailboat checks help prepare the crew, plan the route, and ensure systems are ready for emergencies. Below is a basic procedure for daytime sailing. For overnight passages, open water, or long cruises, this list will need to be expanded.
Where to start preparing your crew, route, and emergency plan
Preparing the boat for departure begins with the crew. Equipment is selected based on the actual weather: in rain and wind, waterproof clothing, deck shoes, and a warm layer are needed, while in the sun, a hat and sunglasses are needed. Life jackets are donned before departure, and gloves are prepared for handling the mooring lines.
Seasickness can occur even on a short trip. It's best to consult a doctor beforehand and take appropriate medications before leaving the marina.
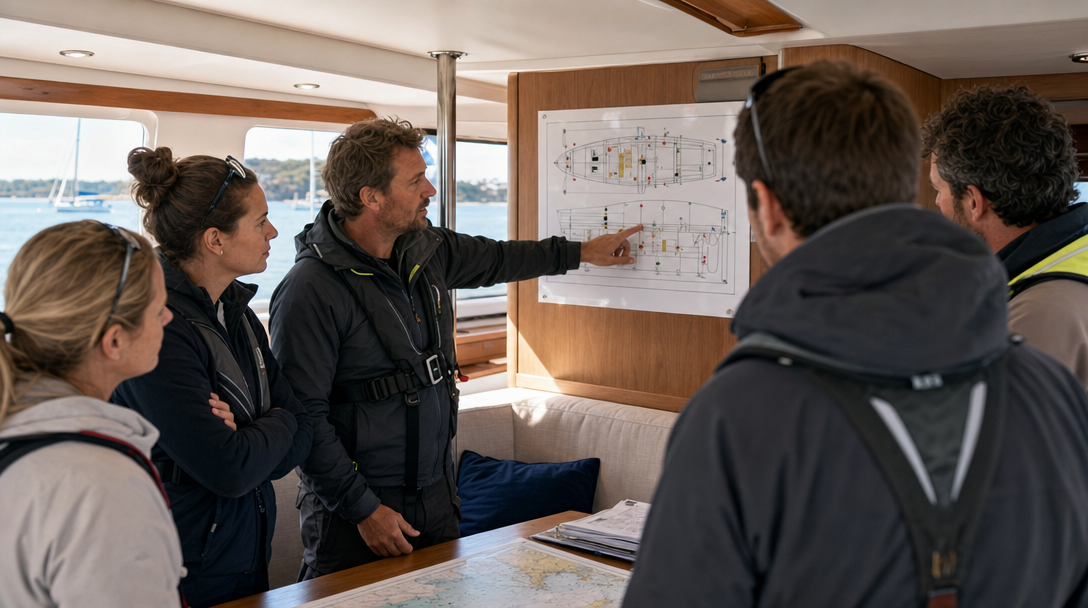
Before unmooring, a short safety briefing is conducted. A laminated diagram is posted in a prominent location so everyone knows where the emergency equipment and sea valves are located. If water gets in, it will be too late to panic and search for the valves.
The minimum set of safety equipment varies by country and yacht size. For example, according to Transport Canada regulations, failure to carry the required item carries a fine of up to $200. Before setting out, it's a good idea to check the current requirements for your area. Additionally, make sure you have a first aid kit, VHF radio, and compass.
The route is also assessed before departure. It's helpful to consult tide and current tables, marine forecasts, and actual weather reports. Currents in British Columbia's tidal passages reach 16 knots, so tables are essential. Electronic navigation is convenient, but always requires a paper backup with a plotting tool. Reports from coastal lighthouses can help distinguish forecasts from actual wave and wind conditions.
- The crew is dressed for the weather, life jackets are ready, and seasickness remedies are determined in advance.
- The safety diagram is accessible to everyone, the location of valves and emergency equipment is known.
- The route is checked against tides, currents, forecasts and actual weather reports.
- For navigation, there is a manual backup in case of electronic failure.
How to navigate the interior, hold, and engine from bow to stern
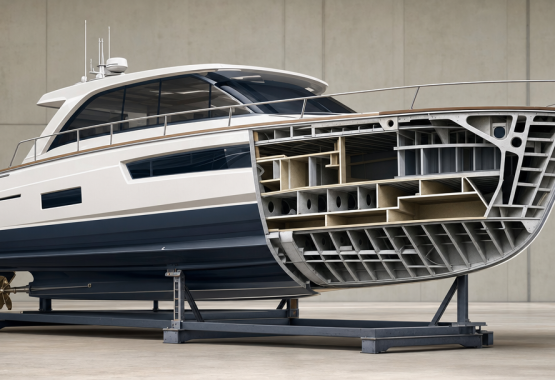
It's easier to inspect the interior from bow to stern. First, check the forward hatch: it should be tightly closed and sealed. Even a small gap will allow water to flow in if a wave breaks over the deck. Windows and portholes are also inspected, especially those located below the waterline or deck level.
Next comes luggage. Heavy and fragile items, like glass bottles, are stowed in lower lockers to prevent them from flying around the cabin. Clothes, maps, and bags should not be left lying on the floor—in the event of a sharp roll, any object in the aisle becomes a dangerous obstacle.
The next item is the bilge. Many boats always have a small amount of water there due to the specific deck connections or sealing. The key is to compare the current volume with the typical level for the specific boat. If there's a noticeable increase in water, it's pumped out and the source of the leak is identified.
It's important to keep the bilge clean. Any debris can instantly clog the pumps: reports of yachts that sank during the Fastnet Force 9 storm mentioned bilges even clogged with tea bags. Before leaving, check the operation of the electric pump with a float switch and the manual diaphragm pump, which is usually located in the cockpit.
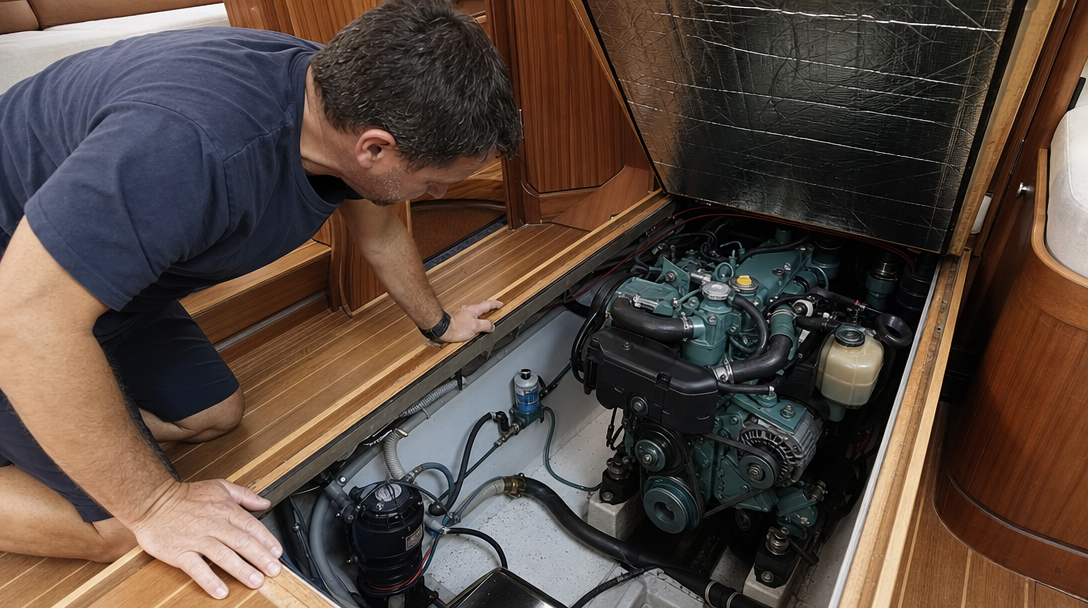
Moving aft, check the aft cabin windows and proceed to the engine room. Inspecting a sailboat's engine begins with a visual inspection to ensure there's no fresh oil or antifreeze in the sump. Next, inspect the fluid levels, hoses, clamps, fuel lines, and electrical lines. Hoses should be intact, and clamps should be tight.
Pay special attention to belts: they should be free of cracks and excessive wear, and the tension should comply with the engine manual. It's always a good idea to keep spare alternator and water pump belts on hand. Fuel tanks should be filled to the brim; under severe rocking, a half-empty tank can disturb sediment or cause air to enter the system.
The purpose of an internal inspection is to establish the yacht's normal condition. Any abnormalities—excess water, a loose strap, or an unlocked hatch—must be identified before exiting.
- Close and seal hatches, windows and portholes.
- Remove heavy, fragile and loose objects; clear walkways.
- Compare the water level in the bilge with the normal level and make sure it is clear.
- Check the electric and manual pumps, ensure they are accessible and free of debris.
- Inspect the engine: fuel, fluids, leaks, belts, hoses, clamps and connections.
How to prepare your anchor, sails, and cockpit equipment for immediate use
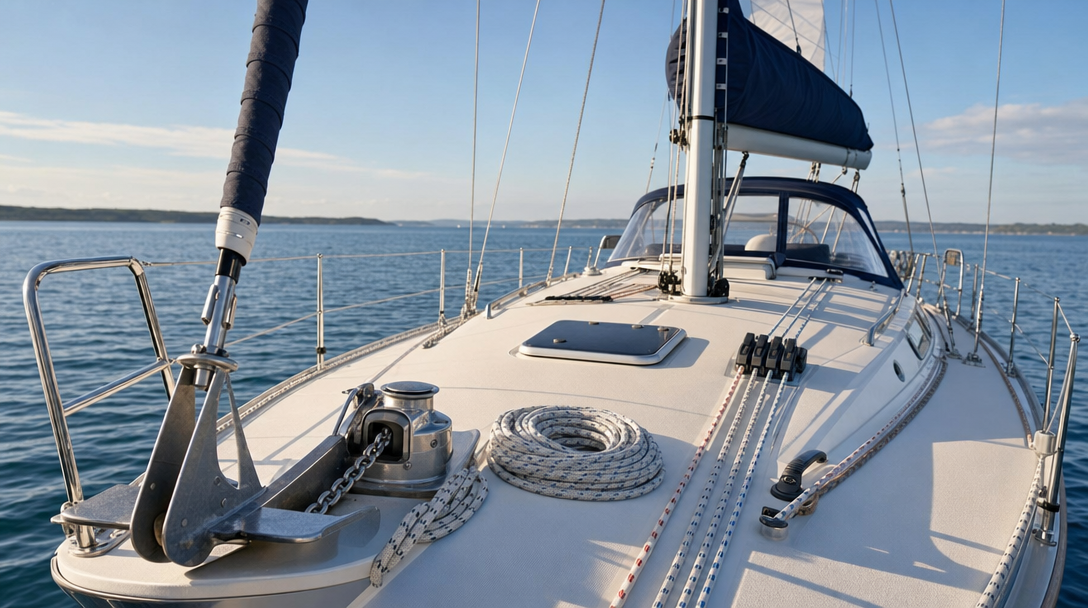
On deck, the inspection also proceeds from bow to stern. It's not enough to simply secure the anchor—it must be ready to release immediately. If the steering fails, it's the anchor that will keep the vessel from running aground.
On a hand anchor, check the locking pin to ensure it stays in place but is easily removed by hand. If a winch is installed, the crew must know where the control panel is located. The chain and rope are stowed so they can be paid out without tangling, and the anchor end must be secured inside the anchor locker.
Checking the anchor and sails before setting out ensures that the emergency power and stopping devices are always at hand. If the engine stalls or the propeller becomes tangled in the water, a well-set sail will save the boat from a collision. Before unmooring, remove the mainsail cover, secure the halyard to the halyard corner, and secure the sail with a quick-release lashing. This will prevent the sail from slipping up the mast, but will allow it to be raised in seconds.
For a furling jib, the sheets are pre-set on the winches, and the furling rope is straightened to avoid tangling. A traditional jib on a clew is lashed to the staysail, stowed in the clew, and the sheets and halyard are also pre-set. The sail should be raised immediately, without searching for rigging or untangling the ends.
The hand pump is checked in the cockpit: its handle should be easily accessible. Lifebuoys and throwing lines are hung on the lifelines. It's best to bring a portable VHF radio, hand compass, and binoculars into the cockpit beforehand.
- The anchor can be quickly released, the chain and rope are laid loosely, the main end is secured.
- The mainsail is ready to be raised and the headsail rigging is clear and tangled.
- The hand pump is in good working order and its handle is accessible.
- Life-saving equipment, radio, compass and binoculars can be quickly taken from the cockpit.
How to clear the deck and securely fasten the tender
The pre-departure inspection of the boat concludes with a cleanup of the deck and cockpit. Coils of rope, clothing, and navigational instruments should not be left lying around. A jacket removed on a hot day can easily cause a fall. It's best to stow any excess items in the lockers immediately.
On the side decks, they check the fastenings of canisters, SUP boards, and inflatable boats. Any loose object will sooner or later snag the sheet, and someone will have to go to the foredeck to untangle the rigging. The cleaner the deck, the safer it is to handle the sails.
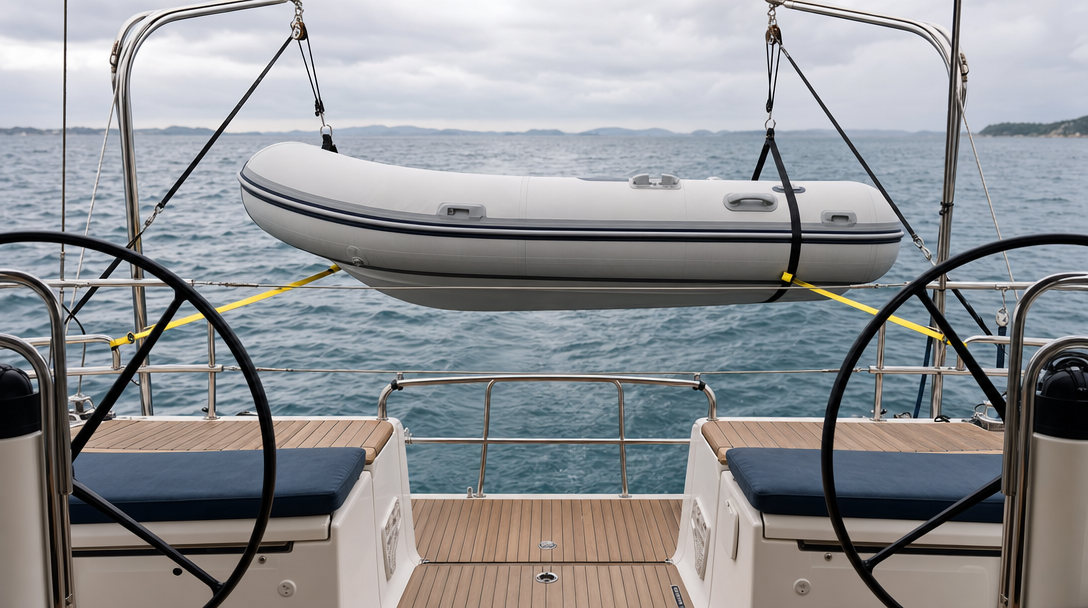
The tender, mounted on davits, rocks in the waves, so it is secured with additional crosswise slings to the stern rail. The outboard motor is typically mounted on a separate bracket on the transom, and all items are removed from the inflatable boat itself.
Towing a dinghy behind a boat is only permitted in calm, sheltered waters. In open water, a strong wind can easily capsize it, slowing the yacht. If davits are not available, the tender is loaded onto the forecastle or secured to the middeck under the boom.
To secure the boat to the foredeck, it's better to use a single, secure, quick-release knot rather than entangling it in a web of ropes. If a fire breaks out or the boat starts to sink, the dinghy will have to be launched immediately. Before leaving, it's important to ensure two things: the tender is securely lashed and doesn't interfere with the operation of the sheets.
When the pre-entry check is completed
By the time the crew casts off, they should be familiar with their tasks and the route, and the yacht's systems should have been visually inspected. This algorithm eliminates situations where, when a cabin floods, the crew can't find the pump handle, or when the engine fails, the sailors don't know how to drop the anchor.
To make sure you're ready, ask yourself four questions: Does the crew know where the emergency supplies are? Is the normal water level in the hold clear? Is it possible to drop anchor and raise the sail in seconds? Is the dinghy securely fastened? This sailboat checklist covers the basic needs of a daytime outing, and for long-distance and overnight trips, it can be easily adapted to the specifics of your particular vessel.