
You're standing in the charter company's office, handed a checklist listing fenders, mooring lines, life jackets, and deck brushes. The boat seems ready to go. But this list often doesn't mention the condition of the batteries, anchor winch, or chain tie-downs. What exactly needs to be checked on a charter yacht before the crew loads up and sets sail?
The crew's safety, the charter's comfort, and the security deposit of €1,000–€4,000 depend on this work. The official list is perfectly suitable for inventory, but technical acceptance must be carried out according to a separate procedure—even before bags occupy every available space in the cabins.
How to organize acceptance and not confuse it with inventory
Start with documents and keys, then divide the work. A company checklist helps confirm the presence of equipment: mooring lines, fenders, buckets, brushes, pyrotechnics, and life jackets. Essentially, it's an inventory list, but it doesn't say anything about the proper functioning of the systems.
It's best to entrust the inventory to an experienced crew member, while the skipper or a trained team member will check the items. The rest of the crew should leave their bags on the dock and go get groceries. If you bring your luggage inside immediately, you'll have to constantly move it around during the inspection.
Have your phone ready for photos and a notepad for questions. This yacht checklist is completed in parallel with the official one: the first answers the question "is everything in place?", the second helps determine whether it's safe to use. After your self-inspection, all that's left to do is invite a company representative to go over all the issues.

What systems to check before leaving: batteries, engine, and anchor system
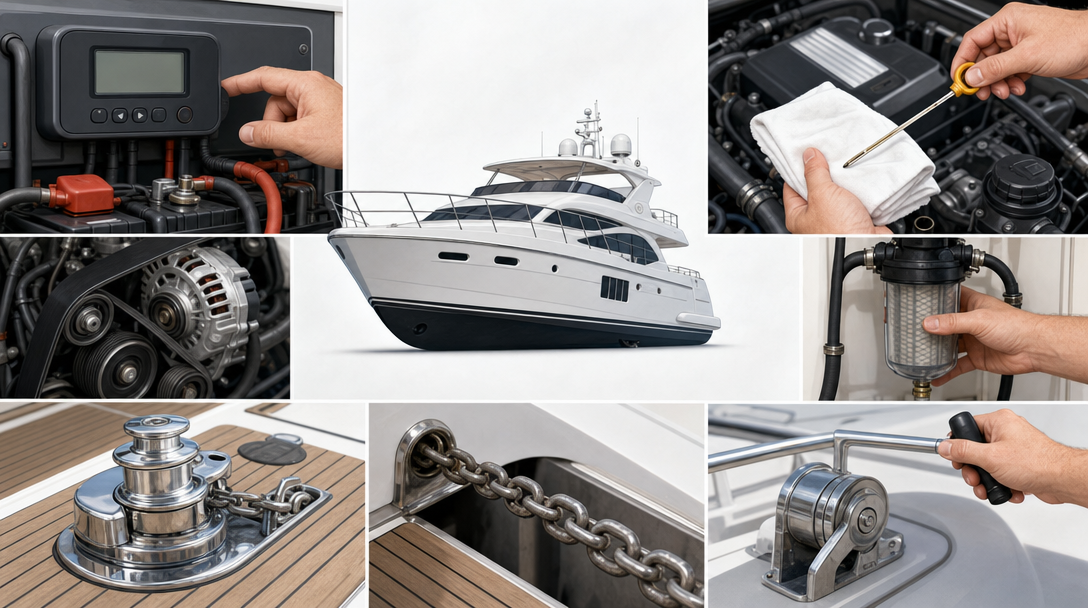
Battery testing begins with disabling shore charging: turn off the shore switch on the main panel, then turn on the main loads—the cabin lights, refrigerator, water pump, and ship's lights. After an hour and a half under load, the voltage should ideally not drop below 12.4–12.5 V. This value helps you understand what to expect during the trip.
Weak batteries will prevent you from sailing for long periods on autopilot and will limit the comfort of overnight stays at anchor, when you'll have to turn off the refrigerator at night. Any issues should be noted before speaking with the manager.
Checking the engine according to the instructions
When inspecting the engine compartment, it's helpful to use the following checklist: oil, water, bilge, belt, exhaust, fuel, coolant. The external cooling circuit is inspected through the transparent filter cover. The filter itself should be clean, the clamps tight, and the area around the water pump dry. White salt deposits indicate possible leaks, so it's worth showing them to a technician.
Check the engine oil level with the dipstick, then move on to the gearbox. Insert the dipstick into the gearbox without screwing it in. Both the level and color are important here: white oil sometimes appears if fishing line has become tangled around the screw and damaged the lower oil seal. Inspect the belt for wear and cracks, and check its tension by pressing with one finger: 1 cm of sag is acceptable. The oil pan under the engine should remain dry, and the coolant level should be between the minimum and maximum marks. Also, check the fuel gauge on the dashboard against the actual tank level.
Start the engine and check for water flowing overboard—this checks the external cooling circuit. If there are no ropes near the propeller, engage forward and reverse gears sequentially. A swirling stream of water behind the stern and a slight slack in the mooring lines when in reverse confirm that the boat is trying to move. While the engine is running, check the bow thruster by first retracting the moorings.
Anchor winch and manual chain release
Open the anchor chain locker, securely fasten the lid, and test the winch operation from the control panel. Be sure to locate the connection between the chain and the rope tied to the yacht. If this connection is missing, the entire chain could fall overboard when released. Pay attention to the color markings: they are usually placed every 10 meters, and a color-coded marker is attached to the locker lid.
Since an electric winch only operates when the engine is running, it's important to ensure the chain can be released manually. Using the special handle and the holes on the windlass, release the locking pin and release the chain slightly. Find out the location of the anchor winch fuse in advance. Under heavy load, it can trip, and its location is often indicated in the owner's manual.
How to inspect the hull, sails, and rigging before your first sail
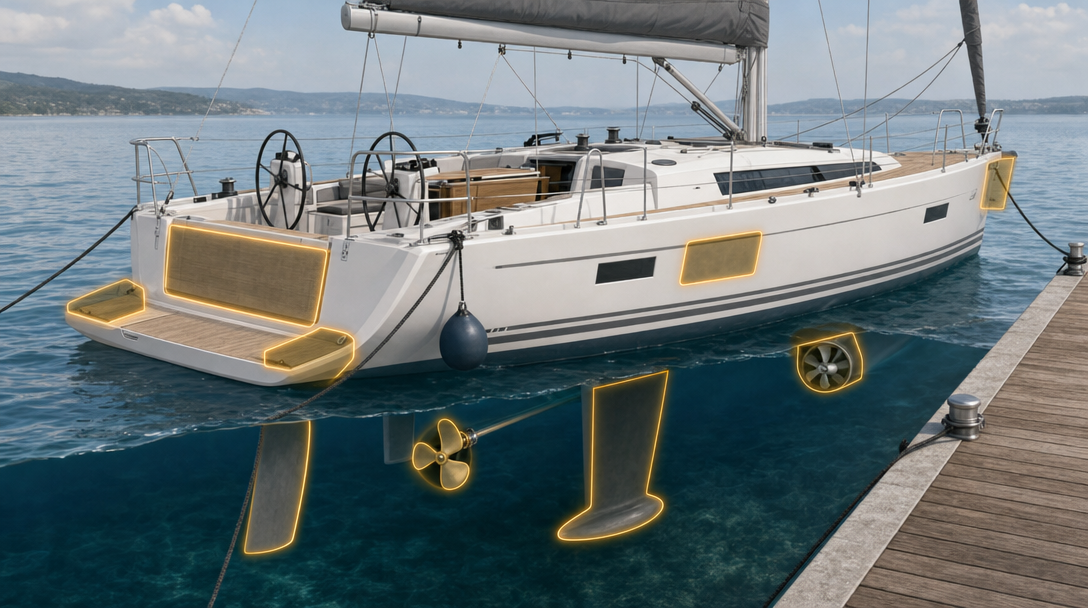
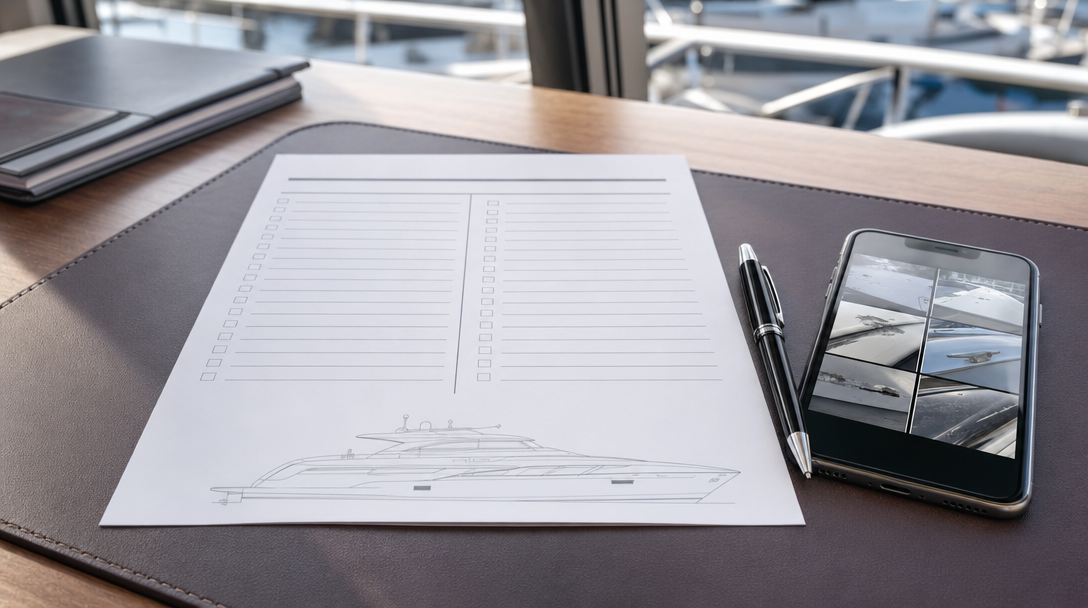
It's best to inspect the yacht's hull before chartering it along a single route—from stern to bow. Photograph and feel all chips and scratches, paying particular attention to the corners of the swim platform, the transom perimeter, the midships, and the stem. A tactile inspection is necessary in case the damage has been covered up. Mark any defects found on the boat's thumbnail in the checklist or on a hull diagram you've drawn yourself.
Assessing the underwater section in a marina is difficult because diving is prohibited near the dock. First, ask the company for photos of the bottom, which the diver takes between charters. A self-inspection is only possible at the first anchorage. There, four elements are inspected: the thruster blades, the lower edge of the keel, the rudder blade, and the propeller. Any line or rope fragments protruding from the propeller are an indirect sign of a possible seal problem.
Charter companies often offer to inspect the sails at sea, as it's difficult to raise and lower them across the entire fleet in one day. If conditions at the base allow for sailing, inspect the mainsail, the condition of the luff sliders, the lyctross, reefs, pockets, and battens. On the jib, inspect the foot and leech, the areas near the pulpit, as well as the lyctross and fairing. Wear on the UV protection doesn't affect the sail's performance, but it should still be noted.
Next, move on to the standing and running rigging. There should be no protruding wires or strands from the shroud crimps, no cracks in the turnbuckles, and cotter pins and locking elements must be in place. Inspect the shrouds, forestay and backstay fittings, the boom, and its guy. If the shroud tension is in doubt or the purpose of a particular rope is unclear, add this item to the list of questions.
Walk over the blocks and feel them with your hands: a chipped plastic cheek leaves a sharp edge that quickly wears the sheet. Inspect the swivel, locking screws, jib track carrier, and its latch. Returning to the cockpit, open and close the latch catches, but do not ease out the main halyard or jib halyard if the sails are furled. Finally, insert the handle into each winch and turn it back and forth.
What to check on deck, in the cockpit, and in the navigation equipment
Go out to the dock, step aside a bit, and look at the mast: the spreaders should be symmetrical and without bends. Inspect the fore and aft pulpits, guard rails, cables, rings, and locking bolts. Open and close the anchor hatches, inspect their fastenings, and photograph any deep scratches. Make sure the mooring cleats are secure and the navigation and masthead lights are working.
In the cockpit, check the seams of the sprayhood and bimini, lay out the tabletops, and test the platform mechanism. The inflatable dinghy should have fully deflated bladders, and oars, intact rowlocks, and a pump are included. Start the outboard engine and check its performance. White oil in the engine sight glass may indicate that it has been submerged.
Turn on the navigation equipment: Windex and the depth finder should display information, and the autopilot should take control. Be sure to confirm with the company representative whether the depth finder is based on the bottom of the keel or the water surface. After disengaging the autopilot, rock the steering wheel to check for play. Turn on the VHF radio and ensure it reads GPS coordinates and contains the MMSI number. Communication can be tested using a second portable radio, which should be charged immediately. Finally, locate the gas locker, ensure the gas cylinder is full, and locate the life raft.
How to check internal systems and prepare a list of questions
Inside, begin your inspection with the toilet: potential faults are often related to the pump, check valve, pipes, sea chest, or black tank. Make sure the drain valve is open; if it's closed, touch it only with the charter company's permission. One way to check is to pour a small amount of milk into the toilet and pump it out. The liquid should drain immediately, and a white spot overboard will indicate that the path to the drain is clear. On an electric toilet, it's important to ensure the bowl doesn't overflow when flushing and filling simultaneously.
Pour some water onto the shower floor and check if the bilge pump is working properly. While you're at it, open the faucet and check if hot water is flowing. Locate the freshwater pump by the sound of the pump. If the yacht has multiple tanks, there are switches located near the pump. It's helpful to know which tank is currently in use and where these valves are located.
Raise the floors and inspect the hull frame and keel bolts; there should be no cracks around them. Pour a few liters of water into the bilge well; the pump should automatically start and pump it out. Take separate photographs of any chips or scratches on the interior.
Find the gas switch, turn it on, and check the burners in the galley. Quickly inspect the cookware and cutlery. Consult the owner's manual: it lists the main dimensions, draft, mast height, tank capacity, and the location of the fuses and seacocks. Any unknown valve or switch position should be noted down for the technician to check, rather than making assumptions.
How to submit comments and finalize acceptance with a charter company
During the inspection, divide all questions into two columns: critical and non-critical. This applies to both technical condition and inventory shortages. Critical items directly impact the safety of the launch; non-critical defects won't prevent you from casting off, but they should also be recorded. Invite the base manager or company representative with your prepared list.
Review the critical comments with him and discuss the remaining ones. Not all defects can be corrected on the spot, so the results should be documented in writing: mark the damage on a diagram, attach photographs, and include the missing items in the acceptance documents. This documentation proves the condition in which the boat was received.
It's safer to freeze the security deposit on a bank card rather than hand it over in cash. If any new damage occurs or anything is lost after departure, notify the company immediately. There's no point in concealing the defect: it will be discovered upon return of the yacht, but the damage assessment will be less favorable.
The yacht has been accepted: what needs to be recorded before departure
The yacht's technical acceptance supplements the inventory sheet, not replaces it. By the time the yacht departs, the crew should understand the condition of the systems, know the answers to technical questions, and have a written record of any defects and shortages already identified.
- Are inventory and technical inspection separated?
- Are the damages photographed and marked on the diagram?
- Have critical issues been discussed with a company representative?
- Are there any written agreements regarding comments that are not immediately resolved?